Miniature landscaping and other gardening projects for dollhouses, roomboxes and dioramas
Many dollhouses have their own properties, extending into the outside. This page is for outdoor projects.
see also gardens. porches, villages, greenhouses, florist, flowers, plants and potting
What about those toys kids leave lying around on the yard? does the yard have fences?
Other scenes need landscaping too - market_stalls, rainbow_bridge
Check the animal page to learn how to make snails!
Links to miniature projects
 |
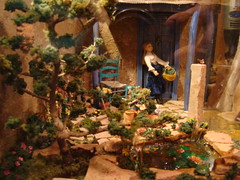 |
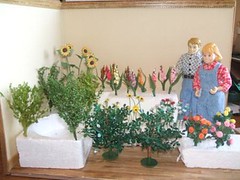
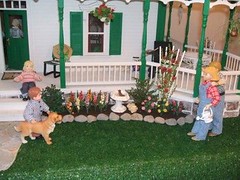
| pic3 |
|
4
|
5
|
6
|
7
|
8
|
9
|
10
|
photo albums, blog posts, webpages
Arbour with Bench - by Jane
Bill Langford - gallery of projects
Front Yard and Crushed Stone Path - by Grazhina
Flocking - from Rubberstamping
Gazebo - by Doreen Playter
Rainbow Bridge
Blogs
- Blogs concentrating on landscaping or categories/labels about it in blogs
Groups
- Discussion groups, forums (or forum categories) and photo groups dedicated to landscaping.
CITY MiniScenery
Miniscaping - have to join but the group is free. Stunning dioramas and model landscaping
Mini Scenes And Things Flower And GardenMinis
Supplies for sale
- Supplies needed for making landscaping projects.
Amsi Miniature Supplies - large selection
Art Rocks - perfect for dioramas, model train displays, decorative water fountains and much more. Originally sold only in the professional taxidermy market for habitat construction,
Ceynix Miniature Trees
Delux Materials
Flower Soft
Scenic Express
Selkirk Scenery
Static Grass Ground Cover - from Woodland Scenics
Treemendus - the home of quality Scenic Modelling Materials.
Walthers Model Railroad
Miniatures for sale
- Do you have a section for landscaping in your shop? Add a direct link to that item here.
Acanthus Miniatures
All Things Small
Diane Harfield
Books
- Books about miniature landscaping projects (also books with chapters about them)
Instructions for miniatures
Miniature printables
Wallpapers
- Wallpapers that go well with landscaping projects
Other Printies
- Book/magazine covers related to landscaping
Links
- links to sites showing how to make items related to landscaping
Bushes - making bushes using sisal rope by TwofootBill
Bushes - by Doreen Playter
Build a Flower Border - CDHM tutorial by Tracy Topps
Create a Base for your Scene - by Mrs Greene
Fake Grass Ideas - from eHow (see static grass groundcover in supplies for sale)
Grass - from Dollhouse Miniature Madness
Gris Gris house - by Brandaen Jones
Ground Foam for Pennies - from Dan's Resin Casting
How To Hills - from Paint-Forge
How to Landscape a Miniature Scene - from Dolls Houses and Minis
Landscaping Ideas - from the littleroomers blog
Landscaping tips - a variety of tutorials from Figuresnbits
Landscaping Tips - from My Miniature Madness
Landscaping Tips - from the Model Rairlroader
Landscaping Tips - from TerreGenesis. Lots of projects to look at lots of great ideas. For example the Aztec gateway, ooooh the entrance to a theme park, part of an Art Deco scene, part of a museum of history. From the Elvin house,, books and scrolls to making steampunk cogs, from fir trees to waterfalls, from fantasy to modern.
Lizard Landscapes- waterfalls, rocks, for RL lizards
Make your own Flowersoft - from Penuts and Peppers Papercraft (grass, flowers, etc)
Miniature Landscaping Part 1 - from Grazhina’s page
Mossy Steps and Fall Leaves - by Otterine
Pinecones for ground cover - from My Own Miniatures
Realistic Grass - from Boy's Life
Rocks - by Dorothy Hays, My Minis2
Scenery Tips - from Train Web
Slugs and Snails - by Pixie Dust Miniaturesd
Stone Planter - from Ehow using polymer clay
Topiaries and Hedges - from Doll Divas (1:6 scale)
Videos
- YouTube videos about miniature projects related to this subject
Make grass using hemp rope and food colouring - from DIY Cafts by Ebi Renaldi
How to Make Scenic Glue and Realistic Hedges - by Whitney LaBrie
Research/ Inspiration
Tips/Hints
- Use kitty litter for gravel and small rocks! its amazing stuff and looks great painted -takes glue really well, and comes in lovely pebble rock shapes right down to dust- really useful- even if you don't have a cat- a pack of litter in your stash is good to have!
- Weed and grass clusters - Lay the bits of greenery across the line of glue, let set for a minute, then roll it up between your fingers, plant, and then spread out the top.
- For foliage etc. model railway shops (and there are lots online) carry lots of landscaping supplies in small scales. Fill shaker bottles of various mixtures of these foams. As well, leftovers from landscaping projects can be swept from a paper plate into a large container, including bits of wood shavings, coffee grounds, etc. This all-purpose mixture works great for forest floors. A tiny touch of golds and browns, even a rust, among the greens brings more realism, providing something of the fleeting look of lights and shadows found in real life.
- Try the grocery store for vine material. A green scrubber by 3M will pull apart into vines. It can be used it in all scales.
- Use either air dry clay or Styrofoam to build up areas to give a little height for flowers and bushes. Paint the entire area to be landscaped with either green or brown acrylic so any missed spots with the landscaping foam will blend in. For bushes, break off different sized/shaped clumps of foam and sprinkle them with floral foam for flowers. For hedges, use the same foam clusters but square off the edges. The glues for landscaping are Aleene's Gold Bottle Tacky (sometimes thinned down a bit - a drop of detergent makes the glue stick better) or Elmer's School Glue. The secret may be to give the glue time to set up after you attach any landscaping. For grass, mix a few shades of fine foam with landscaping dirt, cover an area with glue, then foam, pat it gently, and walk away for a few hours before removing the excess by lightly shaking. If a few spots are bare, add more glue, more foam, and more waiting.
- When glue in a bottle starts getting too thick for its original use, dump the glues into a single container, but a red X on it so you know it's icky glue, and use that for landscaping or paper mache or whatever.
- Need some longer grass for a field? Try to find some grass coloured eyelash fabric, then scatter some wildflowers around.
- Compressed brick of coconut coir is easy to find nowadays as many prefer it as a substitute for peat moss. It is resistant to bacteria and mold, has a nice warm earthy color and is very durable meaning it will last for years and years. All natural and eco friendly since it is a left over by product of using the longer fibers for other purposes.
Just slice some off the brick and crumble it. Make it super fine doing something like a mortar and pestle or rubbing it between a couple of bricks. Or leave a little larger chunks to recreate the look of bark mulches in 1:12 scale or decomposing bark on the forest floor. A very fine sift of it this will make good looking garden soil as well or use it around the base of potted plants.
So friendly, durable, good color, easy to use and very affordable and easy to stash since it is compressed in size. It costs just under $3.00 for a brick large enough to do quite a lot of projects. Also easy to share with a club for projects or package it into kits.
- Try applying foam to a freshly painted surface, and let dry.
- Tiny Vines and Climbing Plants for smaller scales- brown embroidery floss, Aileen's Extra thick tacky glue, green craft paint, Woodland scenics grass or flocking in green, wax paper This method is hands-on and messy but the results are great.
Measure out about 6 inches of embroidery floss. Separate into various groups of 3 inch pieces 1 strand, 2 strands and 3 strands.
Take your Scenics material or floss and spread it out very thin and scattered on a section of the wax paper. (don't have it covering the entire sheet some blank spaces are fine.) Dip the tip of your index finger in the green paint. Blot most of the extra off and run your finger down the floss. You don't need to cover the entire strand. Let some of the brown show through. Do not try to get it perfect or even. By the time you do all of the strands, your first ones will be fairly close to dry if you have not saturated the floss. Wash your hands and the floss should be ready to go. Now, dip the tips of your index finger and thumb in the glue. Slide a piece of the floss between your index finger and thumb then keep hold of the very end. Holding the opposite end of the floss with your other hand, dip it in the scattered greenery. Trust me when I tell you it doesn't take a lot and you don't want the entire strand covered. Lay them on the wax paper to dry.
When you are finished and they are dry, you can start with the thickest pieces for the base of your vine and add smaller and thinner pieces scattered out as you go up. The Aleene's Extra Thick Tacky glue is the best to do this with and gives the best results. Now, if you want it to be a flowering vine, you can either add tiny pieces of colored paper you've twisted on the end of a pin, or soft flock material or even dip the end of a toothpick in paint and add dots of paint. You can also alter the colors of floss you use or the colors of paint when making your vines and climbing plants
- For grass, use fake fur trimmed to height, and painted various shades of green, or terry towel. Can't you see the faux fur being especially effective for a half-mowed lawn?
- Use different scatter materials for landscaping and apply by sieving over area wanted then lightly spraying with mixture of white glue (PVA), water and dash of washing up detergent (helps flow). Doing this mixes a variety of colours to simulate earths and grass.
- Shape Styrofoam or fine steel wool into the bush you want and cover it with white glue, then roll in dried parsley flakes. Put the parsley flakes in the food processor for a minute to make them smaller.
- A vine is made by covering a thread with glue and sprinkling on parsley
- Change your dollhouse landscaping for the seasons. cut matboard to fit the base, then decorate for winter, spring, summer and fall. See Judy Ferguson's Halloween porch, Christmas porch, summer porch
- Look at taxidermy sites for ideas in habitat, scenes, etc.
- Builders foam makes a good base - see foamcore page
- Use paper mache egg carton pieces to make raised areas. Just cut and tear into odds and ends of pieces, drop them into a watery gluey mixture in a bowl for a few minutes, then push, pull, smush and poke until little hillocks and raised areas appear on my base. If using a building, make sure to provide the spot for it during this process.
Let this dry for a day or so, then paint with a mixture of tacky glue and dirt colored paint, then sprinkle a combination of dried coffee grounds and a mixture of fine model railroad grass textures in varying shades of green. A large plastic bottle that originally held dried parsley is handy for a ready made mixture of those bits and pieces. Just shake from the bottle, or dip with a small measuring spoon, depending on the size of the garden.
Egg carton pieces can be used without soaking, as well. Glue them in little tiers and stacks, then smash them together with whatever hard implement on hand, then glue them to the base, added paint and glue and coffee grounds and grass mixtures.
The floral foam intended for dried flowers, is great, because it indents and smushes easily. Frankly, whatever is within reach can be useful, including wadded up paper and cardboard from junk mail, covering it all with dampened bits of paper towel to sort of meld it together before painting and adding the dirt and grass. The key is to let the early stages dry somewhat before doing the rest.
Ideas about what is needed for these projects
- links to inspiring pages/books
Miniature Cottage Landscape - by John Constable, uses live plants in scenes.
The Model Railroader - lots of ideas for inexpensive landscaping here!
The Tree Barber
- YouTube videos about the subject
Hits since 4 Sep 2009: 
ShareShare


Comments (0)
You don't have permission to comment on this page.