If you are citizen of an European Union member nation, you may not use this service unless you are at least 16 years old.
You already know Dokkio is an AI-powered assistant to organize & manage your digital files & messages. Very soon, Dokkio will support Outlook as well as One Drive. Check it out today!
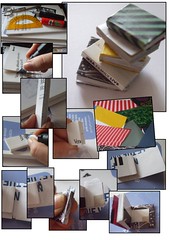
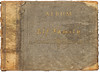
Used scrapbook paper or paper printed from the internet. Joanne's has a scrapbook paper which resembles leather - don't forget those textured paint sample squares from the DIY Centre! Try real leather from old wallets or gloves from the thrift store. For the edging, it is really important to use extremely thin leather or skiver.
A stamp pad gold or champagne ink or an “old paper” or “tea dye” ink provides the coloration for the edges, making a more realistic look than stark white. I didn’t want white). Color the edges before the cover is attached. The stamp pad ink allows the pages to be opened, whereas paint or marker will make them stick together. Your choice.
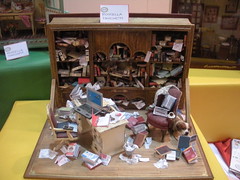
Of course, sometimes, you don’t want the pages even and you want your books bigger and a little less “nice” looking, for a magical or medieval scene. Make them thicker, wider and a whole lot dirtier, using a less delicate leather on all of these and then all manner of things to age the leather. Sand, ink, stain, re-sand, re-stain….until satisfied. Chalks and sometimes plain old dirt are useful.
About open books:
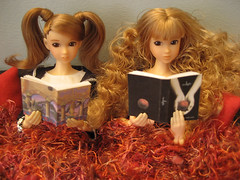
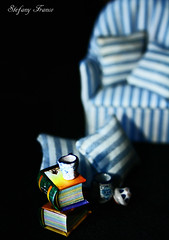
Start with a same book “blank”, attach the cover and then press the book open, usually in the middle. If the binding is glued sufficiently, it should not fall apart. For open books, use paper that has been aged to a cream or tan color. Put a bookmark ribbon down the center - glue a piece of silk ribbon into the binding at the top and then drape it over the page.
The two “printed” pages are made in several ways. Print out whatever the selected test/pictureI want on a pre-tea stained piece of parchment or tracing paper. Then cut it to size and glue it over the blank page. The parchment pretty much disappears. Or just add two printed pages (same paper as the book) to the center with glue and press them back. Then add the silk ribbon. It will be necessary to weight the book in the open position for a while to keep it from closing. Press it between two pieces of thin wood with spring clothespins.
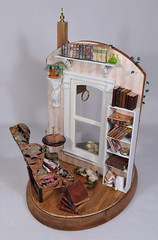
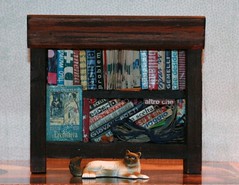
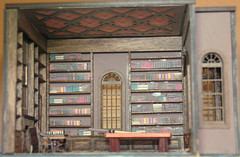
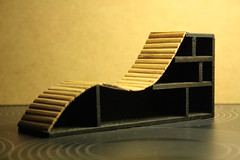
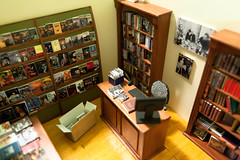
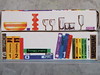
To fill the bookcase, cut foam-core to size, paint the edges with gold paint and cover them with scrapbook paper. They cannot be removed from the bookcase.
Add paper details to the leather covers easily. One trick to make the paper look like part of the leather is to rub it lightly with petroleum jelly (just a teensy dab) and buff it with a cloth. It soaks into the paper and makes it somewhat translucent.
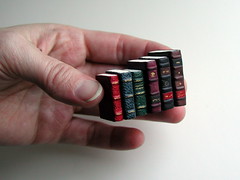
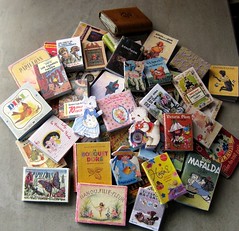
If you are even the least bit computer literate, you can reduce and print out covers and text for your mini books. Of course, on the smallest sizes, it will not be legible so it really just depends on what your final goal is.
Hundreds of books are on the Project Gutenberg site. These are copyrighted by this project but are otherwise free because they were published pre 1925. Permission is needed to print more than 10% of any book, but just the cover and facing pages for an 'open' book display, or just the cover for a shelved or stacked bunch of books, is less than10 %.
Saskia uploaded a wonderful Word document to our wiki that contained a lot of good tips for book making. I copied the content on this page but could not copy the pictures easily as they were from Blogger (Picasa) and for them only the owner sees the embedding code. I thank you Saskia a lot and I hope people continue contributing on this page :).
The word document itself had to be removed as this wiki is not for storing files but for co-creating content on wiki pages. This is the only way we can create the best instructions :).


Comments (3)
johanna janhonen said
at 6:21 pm on Jan 12, 2011
Saskia uploaded a wonderful Word document to our wiki that contained a lot of good tips for book making. I copied the content on this page but could not copy the pictures easily as they were from Blogger (Picasa) and for them only the owner sees the embedding code. I thank you Saskia a lot and I hope people continue contributing on this page :).
johanna janhonen said
at 6:23 pm on Jan 12, 2011
The word document itself had to be removed as this wiki is not for storing files but for co-creating content on wiki pages. This is the only way we can create the best instructions :).
Linda McD said
at 7:00 pm on Aug 9, 2012
Johanna, can't you find a link to the blog post and add that to the wiki?
You don't have permission to comment on this page.