If you are citizen of an European Union member nation, you may not use this service unless you are at least 16 years old.
You already know Dokkio is an AI-powered assistant to organize & manage your digital files & messages. Very soon, Dokkio will support Outlook as well as One Drive. Check it out today!
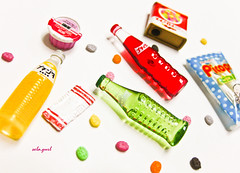
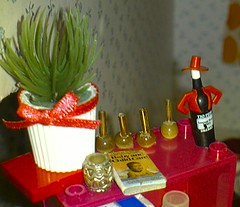
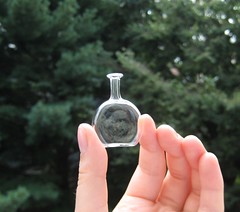
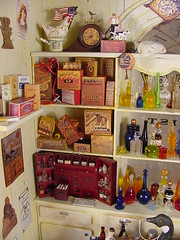
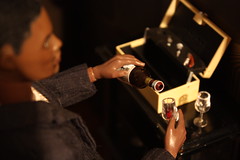
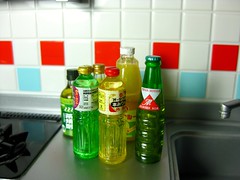
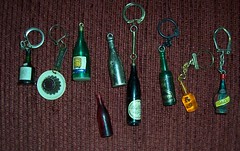
Miniature bottle projects for dollhouses, room boxes, and dioramas
This is the page for all those bottles that stock a pub, medicine bottles for the pharmacy, veterinarian, Doctor's offices. See also glass, jars and vases..
Bottles - from Little House at Pine Haven, using Gallery Glass to add shaping to glass bottles. Instead of laying down stripes to peel up when dry, lay down a coating of the medium and cut it into strips with a craft knife, and apply these to the bottle. Probably any clear medium would work for this. Maybe a way to add a rim around the top of bottles made from straws?
Blogs
Blogs concentrating on bottles or categories/labels about them in blogs
Groups
Discussion groups, forums (or forum categories) and photo groups dedicated to bottles.
Water Bottles - from Lite-Brite Pegs from Anna's Minis and Junk
Videos
YouTube videos about miniature projects related to this subject
Research/ Inspiration
Tips/Hints
QS bottles - Use the empty cartridge from a ballpoint pen. It's a very small piece of tubing. If you go down about an inch from the end and hold a match to it just so it starts to soften and shrink. Lay it out straight until it hardens again and you've created a neck for a bottle on either side. Cut each one to length, using a straight edge razor. You can color them with permanent markers or glass stain. Dot the top with a gold felt pen for a cap.
For 'real cork' corks, check out a scrapbooking place, office supply outlet or Michaels. Most of them will have very thin sheets of cork, some being self-adhesive, which is great for 1/12" corks, but are harder to handle in smaller scales. Simply cut a thin strip the width you need for the length of your cork, and perhaps 3/4" long so you have something to hold on to, then roll the strip around a fine sewing needle or straight pin meant for lace or silk until the cork is thick enough to stay put in the bottle. Self-adhesive cork won't need any glue unless you handle the sticky side too much (hence the difficulties with smaller scale corks), but a teensy smear of tacky glue will do the job on a plain cork. Once the cork is rolled up, mash and twist one end against a hard surface to eliminate any signs of the layers, and once any glue used is dry, cork your bottle. You can use the same method to mass produce corks of the same diameter by rolling a wider strip and slicing individual corks from the long tube.
Another idea (if you have any Fimo on hand) is to create a custom pull-off top. Make a nice marbled or wood-grain mix, or whatever you think would suit your bottle. Form an egg shape, then push the pointed end carefully into the bottleneck to roughly mold a stopper. Pull the clay out gently, and trim the end of the stopper to a good length. Carefully reinsert your stopper back into the bottle, and then go wild making whatever shape top you want. Bake the whole thing, bottle included, and when completely cooled, remove your stopper and if necessary, sand or cut the end of the stopper so it is even. Buff for a low-gloss finish, or use a gloss or semi-gloss sealer as the final touch.
Sharpie Permanent Markers can be used to colour wine, liquor, and perfume bottles. Different effects are produced by colouring just the back side or both sides and edges with the marker -- back side alone is more translucent; both sides and edges give a stronger colour. Other brand markers disappoint with the coverage. Michaels sells individual Sharpies in several colors appropriate for wine. For other uses, Sharpie also offers metallics. If bottles are still in their Plexiglas base, so use the scrap base for testing before colouring the actual bottles.
Look in the kiddies section of art/craft places for glass paint kits. They have about 6 different colours in small amounts for children to paint sun discs etc. (need to check the picture of the final item to see if it has the desired colours as they are often different) and the cost is often less than 2 bottles of glass paints. Having said that the paints are ideal for stained glass windows and things like strawberry sauce and other food items, maybe even a Tiffany lampshade. Usually these are acrylic so will mix with craft paints, or left on their own or mixed to create a new colour, other suggestions are, brown sauce and gravy, raspberry, orange or blueberry sauce and jelly look, I've painted yellow over toast to make butter shiny just look through cook books for ideas, Matte beads used for Christmas ornaments get a shiny glow, just experiment and have fun at the cheaper price you have nothing to lose, always wash the plastic and allow it to dry naturally as the molds usually have a releasing agent and the residue can stay on the plastic. Test on the bottom of one bottle first to assess the result.
Ideas about what is needed for these projects
Links to inspiring pages
Ideas for shop names selling miniature bottles
Spirit in the Bottle / Der Geist im Glas (German) / Pullon henki (Finnish) / ...


Comments (1)
Linda McD said
at 1:47 am on Sep 28, 2015
Page reverted and spammer removed from users
You don't have permission to comment on this page.